After Toolkit > Animators > Wipe Transition
Wipe layers in and out
A great reveal transition for all kinds of use cases.Wipe Transition adds an in and out transition to your layers with a linear wipe effect.
Wipe Transition - Quickstart Guide
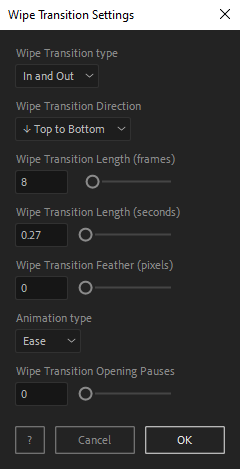
Open your After Toolkit, select your layers, and click on Wipe Transition.You can apply this transition effect to your layers in-point, out-point, or both. Moving the in-point and the out-point of your layer will move the transition accordingly.
Transition Length is the duration of the transition.
Feather defines the bluriness of the transition. The higher the feather amount, the blurrier your wipe transition line will be.
Select your Transition Animation curve, ease or linear. Ease will make the animation speed decrease at its beginning and at its end, feeling more natural. Linear will apply a constant speed throughout the whole animation.
The last option, Opening Pauses, allows you you to add stuttering to your opening transition, to make the effect more interesting.
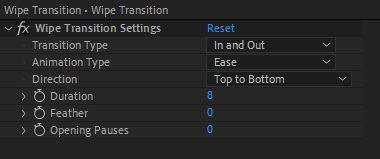
Once you hit OK, you can edit each setting for each individual layer in the Effect Controls Panel.
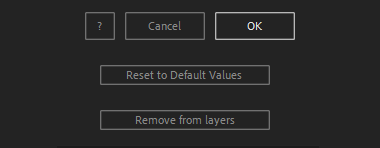
You can also change every setting by reopening the same panel, with your layers selected, and applying new settings that will replace the previous ones.Everytime you apply custom settings, they are saved for the next time you use it again. Reset to default values will revert to original settings, before you ran it for the first time.
To cleanly remove this script, select your layers, click on the script's button again, and click on Remove from layers at the bottom of the window.
This button will appear only if the selected layers have this script applied to them.


